Painting can be a transformative process that breathes new life into any space. Whether you’re repainting a room or tackling a larger project, understanding the best practices and techniques can ensure a professional-looking finish.
In this blog post, we will provide valuable insights from experienced painters to guide you through each step of the painting process, from preparation to touch-ups.
Prepare the Space: Before starting any painting project, it’s essential to prepare the space properly. If possible, remove furniture from the room or relocate it to a convenient area that allows you ample space to work. If furniture cannot be moved, cover it with drop cloths or plastic sheeting to protect it from dust and potential paint splatters. In kitchens, it’s recommended to remove food and other items before beginning the work.
Cover Floors and Furniture: To safeguard your floors and furniture from paint spills and drips, cover them with drop cloths or plastic sheeting. For solid floors like tile or laminate, use floor covering paper. When working on carpeted areas, opt for painting tarps or thicker plastic, ensuring to secure the edges with tape or masker paper. Pay special attention to stairs, using non-slippery tarps or adhesive plastic designed for stair surfaces.
Clean the Walls and Remove Old Paint or Wallpaper: Prepare the walls by cleaning them thoroughly. Remove any picture frames and decide if you want to place them in the same location. If not, fill the holes with a painter’s spackle before painting. Stubborn stains like crayon marks, water stains, or grease in kitchens can be challenging to remove. Consider using stain blockers, such as Zinsser stain blocker or aerosol primer, to cover most stains. Wallpaper removal requires a special process which starts with priming the walls, sanding them, then filling holes with spackle or drywall mud.
Repair Holes, Cracks, and Damage: Take the time to repair any holes, cracks, or damage to the walls before painting. Holes can be easily fixed by applying mud over them and allowing it to dry before sanding it down. Cracks require a more advanced process, which you should consider hiring a drywall professional for. It involves the removal of old tape, applying new tape, applying two coats of mud, and finally adding texture for a seamless repair.
Apply Painter’s Tape to Protect Trim and Windows: To achieve clean and precise edges, use painter’s tape to protect trim, windows, and other areas you don’t want to paint. Before applying the tape, wipe the window edges with a damp cloth to remove dust and ensure better adhesion. For delicate surfaces, consider using 1.5-inch painter’s tapes specifically designed for such applications, such as 3M blue tape or purple tape.
Prime the Walls: Always prime raw drywall before painting, and ensure it is sanded properly. If the walls have been previously painted at least once, primer will not be necessary unless there are unique circumstances, such as the use of oil-based paint. Priming patches will also be necessary as mud/ spackle needs to be primed. This can be done easily with a roller. Remember to sand all primer before proceeding with painting.
Paint the Ceiling First, Then the Walls: Start by painting the ceiling, ensuring everything beneath it is well-covered, including floors, furniture, and cabinets. Wait for the ceiling to dry for 24 hours before taping it off to paint the walls.
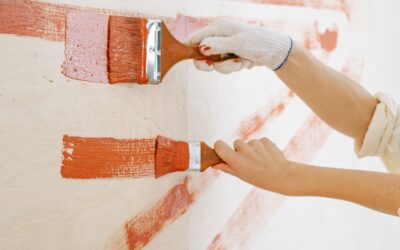
Use a Brush for Edges and Corners, and a Roller for the Walls: When painting, begin by using a brush to cut in around edges and corners. Make sure not to put too much paint on the brush because it can bleed under the tape. For the rest of the wall, use a roller to ensure even coverage. Follow the paint manufacturer’s specifications regarding roller size and apply additional coats as needed.
Rolling the Walls: To achieve a smooth and consistent finish, roll the walls from top to bottom, overlapping each stroke by at least one-fourth of the previous stroke’s length. Be mindful of the paint’s specifications and ensure the roller is evenly wet by using a clean paint pan. Apply additional coats once the previous coat is dry to the touch. Check for missed holes or cracks after the first coat dries and fill them before continuing. Sand any rough areas if necessary.
Remove Painter’s Tape After Paint Dries: Once the paint has dried, carefully remove the painter’s tape. To prevent peeling off the paint, use a razor along the edge of the tape. If the tape has been left on for an extended period or in hot weather, it may stick too hard or peel the surface it was stuck on. Selecting the right tape and working swiftly can help avoid these issues.
.
Touch-Up as Needed: No paint project is perfect, so take a small brush and touch up any areas that require fixing. Address any imperfections or missed spots to achieve a flawless finish.
Conclusion: By following these expert insights and recommendations, you’ll be well-equipped to embark on your painting project with confidence. From proper preparation and priming to using the right tools and techniques, you can achieve professional-level results.